
This blog post is archived. While the measurements (and how to calculate them) are still spot on, I no longer do my book covers in Word. You can use the same measurements to figure out the height and width of the canvas you would need to make your cover in Canva. Thank you! VMR
Every book cover needs a template. You need to create the template for the back, spine, and front. This is what I am going to give you directions to make:
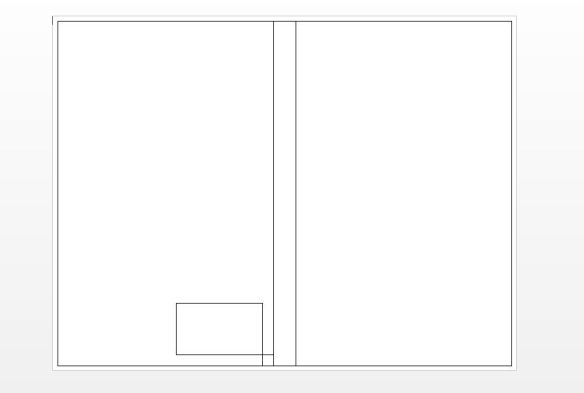
Pretty cool, huh? You have the back cover, (left) the little rectangle where the barcode and ISBN number are going to be, the spine, and the front cover. This is a picture of the template I made in Word.
Let’s first figure out the spine. There’s an easy way and a hard way. There’s *whispers* math involved in the hard way. I’ll tell you how to do it first, so if you like doing things the hard way, you don’t have to stop in the middle of the instructions to figure it out.
You need to decide if you’re using white or cream paper. Apparently cream paper is a little thicker? I have no idea. Anyway, use these formulas that I pulled from CreateSpace:
white paper: spine width = number of pages x 0.002252 inches
cream paper: spine width = number of pages x 0.0025 inches.
This is why we waited to do the cover until after your manuscript was formatted into the template. The first time I did my cover I didn’t wait so my spine was off. I used the regular number of manuscript pages. I didn’t have my front matter included, or my about the author page in the back. I didn’t have my gutter figured in there, or margins, or headers and footers, which all takes up space, adds pages and makes your spine thicker.
Take the number of pages of your completed, formatted manuscript and use the formula above. For Running to Love, unformatted, my page count is 258. I would choose cream paper so the formula would be 258 x 0.0025 inches = 0.645. This is how thick your spine is. So, when you create the text box for the cover, the width of the text box would be 0.645 inches by the height of the paper (8.5 inches) since the spine goes from the top of the page to the bottom.
That’s the hard, sucky way. That’s the way I did it. There’s an easy way. Jewel showed me the easy way after I did mine the hard way.
CreateSpace wants you to have as easy an experience as possible. But if you don’t know where to look for stuff, you may not know it even exists. I didn’t know CreateSpace had a cover template creator until Jewel told me. You can log into your CreateSpace account and search book cover templates. It’s here, and this is what you see:

Choose the interior type. Again, I’m assuming you don’t need any color pages so use Black and White. It will also ask you if you want to see the template with or without bleed. Choose bleed. Bleeding is when the picture goes past the edge of the paper. It is a margin of error for when your book is cut to trim size. When you create your cover, you don’t want words inside the bleed because they could get cut off. There is a great article about bleed here.
The trim size is the size of your book. Did you choose 5×8? 6×9? Bigger? Again, your choice.
Enter the number pages from your formatted manuscript.
Choose the page color.
Click build template.
These are my choices:

This is what I get:
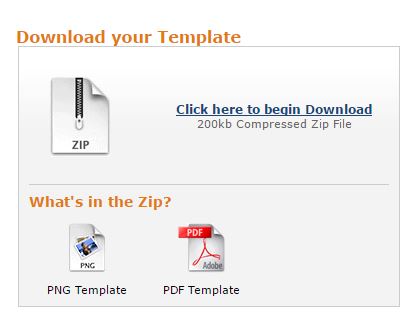
Download the file. Open the zip file and open the PDF. This is what you’ll see:
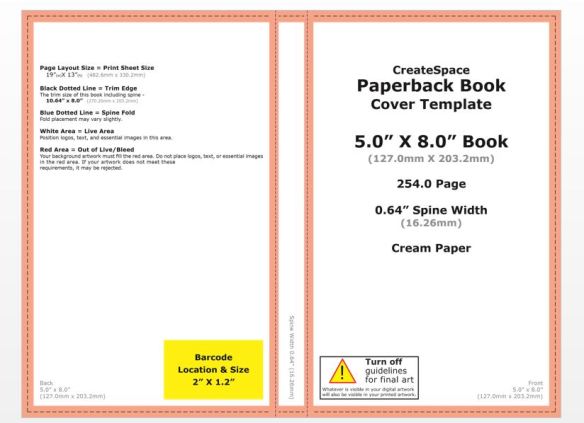
See the small print on the spine? It says my spine width is 0.64 inches. What did we figure when we did it with math? 0.645. Not too shabby. But the template shows you a lot of things: bleed, the size of the other text boxes, the barcode box. Unfortunately, unless you know what to do with the PDF, you can’t do anything with it. It’s a picture. I don’t know how to layer a picture over a picture. Maybe you or someone you know does, and this is all you needed. That’s great, and I’m really happy for you! You’re one step ahead of a lot of people. If you’re like me, you’ll be using the cover template creator as a quick reference for dimensions and then actually making the text boxes that will make your template.
I’ll stop here for now. In the next blog post, I’ll type out the instructions on how to create the text boxes so you can make your own template. The great news is, you only have to do it once. Then you can just adjust the spine when you publish something else.
Until later!
Discover more from Vania Margene Rheault
Subscribe to get the latest posts sent to your email.

