It costs absolutely nothing to publish a book. Nothing.

There are free word processing programs like Google Docs. You can use a library’s internet and computer. Platforms like Draft2Digital and Amazon’s KDP will provide you with some kind of book identification number so you don’t have to buy ISBNs for your books.
All you need to do is write, make a cover in Canva using their free website, use a free for commercial use picture from Pixabay, Pexels, or Unsplash, and you are a published author. All for free.
But when isn’t that a good idea?
Do you know Amazon has over 7 billion books in their Kindle store? And writers publish more every day.
So not only are you competing with everyone you know on Writer Twitter, you are competing with writers who are not on Twitter, big time indies who don’t have much time for social media. You’re competing with traditionally published authors, and those authors range from anywhere between The Big Five to tiny university presses.
You’re competing with writers from the US, Canada, (do you know how many writers I know who live in London, Ontario? A lot!) the UK, Australia, and many other countries.
Over 7 billion books.
Okay. What what is this blog post really about now that I’ve made you feel like crap?
Spending money.
Self-publishing is free.
Until it isn’t.
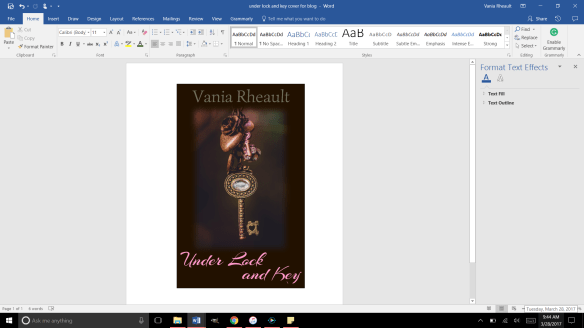
I do everything myself. For my trilogy, and Wherever He Goes, I wrote them, edited them. I formatted them and did the covers. The orangy hue on the third is my fault. I didn’t have the skill to fix it. It doesn’t look bad on screen, but the paperback could look better. That’s just the way it is, and I accept that.
What can you pay for when you self-publish?
- Editing
- Formatting
- Cover
Those are the three big ones. But we can go further:
- Beta Readers/Critique Partners/Book Coaches/Book Doulas
- Blurb writing
- Reviews/Arc review services like NetGalley
- Advertising, ie, Facebook ads, Amazon ads, Promotions
- ISBNs
- Paperbacks for giveaways
- Giveaway fees like on Goodreads
No one is saying you have to pay for all of that–or any of it.
It’s up to your discretion how much money you want to pump into your books.
See, this is the problem. No one wants to admit that they publish their books to sell them. Which leads an author not spending one dime on their books.
They are publishing for themselves. I repeat this over and over again like a broken record:
If you only publish for yourself you have no right to complain if your books do not sell.
But if you can admit you want people to pay to read your work then you have to take a hard look at your book.
Is the cover you made yourself doing the job?
Is your blurb up to snuff or is it confusing and off-putting?
Are there typos in the first few pages of the Look Inside?
If you can’t put out quality work yourself, then you’re going to need help.
It’s that simple.
And that difficult because saying you need help is a lot easier than being able to afford said help.
That being said, you can teach yourself how to do these things.
If you just shut down on me, it’s because you don’t want to take the time to learn. That’s okay. I wear clothes every day. That doesn’t mean I want to learn how to sew.
But what I’m trying to tell you is that you must find a happy medium between doing things for yourself and hiring out the help you need to make your book desirable to readers.
Because remember, readers have 7 billion choices.
Listen, my books aren’t pretty. Use the look Inside Feature for any of my books and you’ll see basic formatting. The embellishments are non-existent.
That’s fine. I taught myself enough to get by, and that’s good enough for me.
Readers aren’t going to care if you have fancy chapter headings if your story sucks.
So, being I’ve published a few things, I can suggest where you should put your money–if you have any, or where you should ask for favors from friends–if you have any. Just kidding!
- Editing. If you’re a newbie writer, this means a developmental edit as well as a line edit and proofing. Plot holes, flat characters. Developmental editing can be more of a job for a critique partner or someone from your writing group. Ask someone who reads your genre so they have a handle on the tropes and feel for the type of genre your book is in. Once you have a stellar story and a solid look inside sample, you need a good cover.
- Cover. Canva.com offers design classes. You need to train your eye and learn what makes a good cover. It can make or break your book. Plus, if you push your book in any way, ads, promos, giveaways, your cover will be the selling point. Look at your genre on Amazon. Look at templates. Try to duplicate them yourself in Canva. You may need to spring for a photo, but that’s not as expensive as you might think. I buy mine on canstockphoto.com for seven dollars apiece. Photos are even cheaper if you buy a credit package.
A word of warning though. I write romance, and slapping some text onto a smiling couple is a lot different than making a cover for an Urban Fantasy novel. Fantasy, of any kind, requires a certain kind of cover. Negotiating a price with someone on Fiverr is a lot better than publishing a book that does not have an appropriate cover. Your sales will stop before they even start. I’m sorry, but that’s just the way it is.
Sometimes you can find a pre-made template that’s cheap.
Sometimes you can even find a photo on a photo site that is already doctored to how you need/want it to be. Set aside hours, days, if not weeks, to click through pictures. I’m barely 20,000 words into my next book and I’m already looking at photos.
- Formatting. Formatting for Kindle takes five minutes. All you need to do is set the options in Word so when you upload it into KDP it converts correctly. If you go wide and you use Draft2Digital, you don’t even have to do that. (Smashwords is a different story, and your Word file has to be formatted correctly or it won’t convert through their “meatgrinder” and they won’t publish your book.) Draft2Digital seems easier to work with, but I’m in KDP Select and haven’t used either of those services.
What is the cost of self-publishing? It can cost as much or as little as you want to put into it.
Someone opening a business always needs to invest. Paying for services is investing in your book business.
I used to think that I didn’t want to invest in my books because I may never get that money back. But that was incorrect thinking.
If my books are well-written, have a nice cover, and are formatted as to not turn anyone off from reading it, eventually, I will see that money returned to me by way of sales.
My books will be sold for years and years. As I slowly make a name for myself, my sales will increase. It will take time, but I’m in it for the long haul, and I have patience.
I’ve put money toward my books by way of taking the time to learn how to do things for myself. I read lots of editing books. I read tons of blog posts about what makes a good cover. I’ve practiced making covers. I’ve learned to format my files. It took time. But time is money. I’ll eventually see dividends on the time I invested in my books.

It’s a personal choice.
This blog post begins a self-publishing series about how you can do most of these things by yourself if you want, and where to look if you don’t. I’ll give you the resources I used to learn and you can decide for yourself if it’s easier for you to hire out, or if you can’t afford it, where you can spend time learning things on your own.
Look for my next blog post about editing resources.
Thanks for reading!


")